

Nicely, it’s a part of the second instalment of this handy “ideas and tips” collection. And identical to the primary set of ideas and tips, the next options take actually seconds to arrange (or be taught), and when you begin utilizing them, you’ll by no means look again!
- How one can edit a whole bunch of images and movies in seconds – that’s not a joke, I promise
- How one can make the sunshine in your iPhone images and movies look extra real looking each time, on a regular basis
- How one can take a Portrait mode photograph with out the necessity to take a “Portrait mode” photograph
- How one can take a surprising Portrait mode photograph with virtually zero mild
- How one can use Motion mode to get tremendous easy movies when recording by means of the window of a shifting automotive
- How one can use the iPhone’s photograph editor to attract the straightest, most good arrow to point out your buddy precisely the place they need to be wanting in a screenshot
Like the primary time, these aren’t just a few “ideas and tips” I’ve picked so I can put collectively this text. I take advantage of each single one in every of them on my iPhone 13 mini and the iPhone 15 Professional Max I’ve for testing.And whereas a few of you could be conversant in a few of the tips and options listed right here, I do know you’ll be taught a minimum of one new iPhone digicam trick, and if that’s the case, you then win $100… Aaand… I simply checked, and the final bit is 100% not true.
On to the iPhone digicam tips…
Taking images with iPhone won’t ever be the identical once more: 10 secret iPhone digicam options it’s good to attempt ASAP
Do you know you’ll be able to “copy-paste” your photograph/video edits on iPhone?
Truthfully, I don’t recall the precise second I realized this iPhone digicam trick, however I promise you two issues: For one, the second I discovered I can do this, enhancing images/movies on iPhone grew to become a wholly totally different course of for me. And two, I genuinely consider this could be one of the vital underrated iPhone options in historical past!
For individuals who already comprehend it, in fact, I’m speaking concerning the potential to copy-paste photograph/video edits for sooner, constant enhancing.
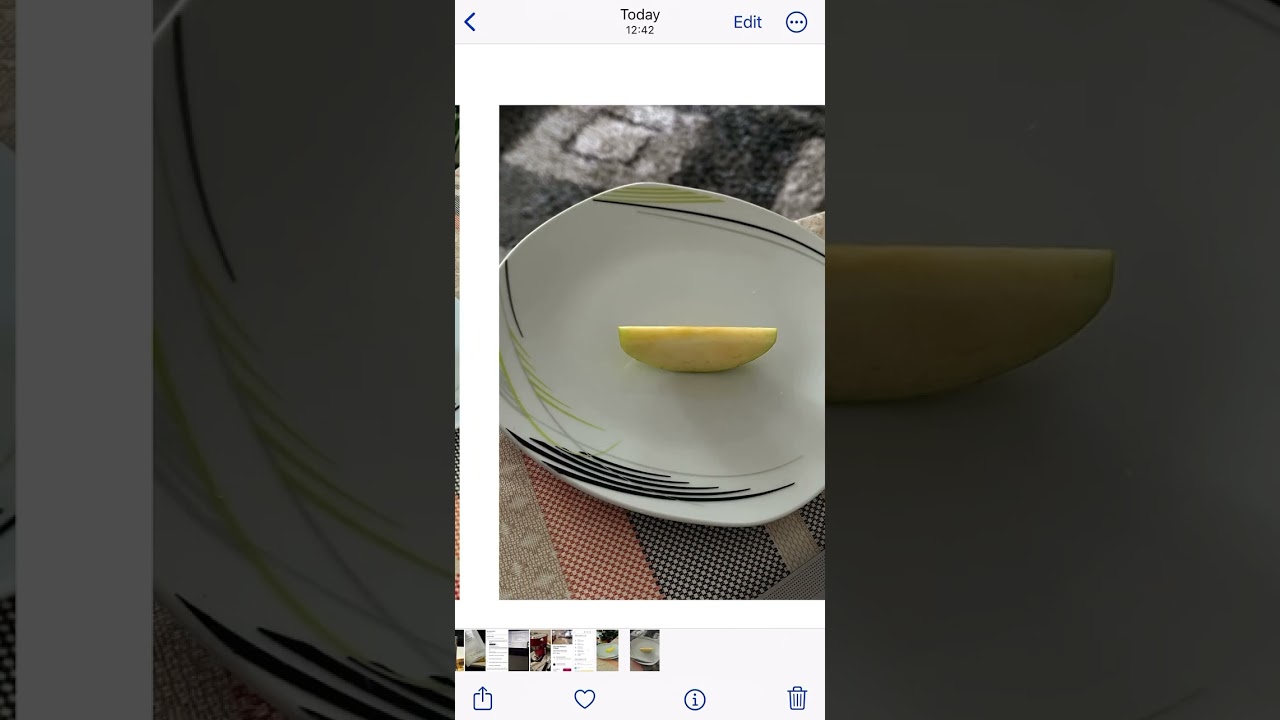
Go to your Photographs app, edit a single photograph/video to your liking > From the Editor, press the three dots within the high proper nook > Copy edits > hit the Paste edits button > Maintain pasting your edits on to totally different images/movies. Or you realize – simply check out the video tutorial I’ve recorded…
Your iPhone digicam (virtually) all the time takes images and movies which might be too shiny however the repair will be quite simple
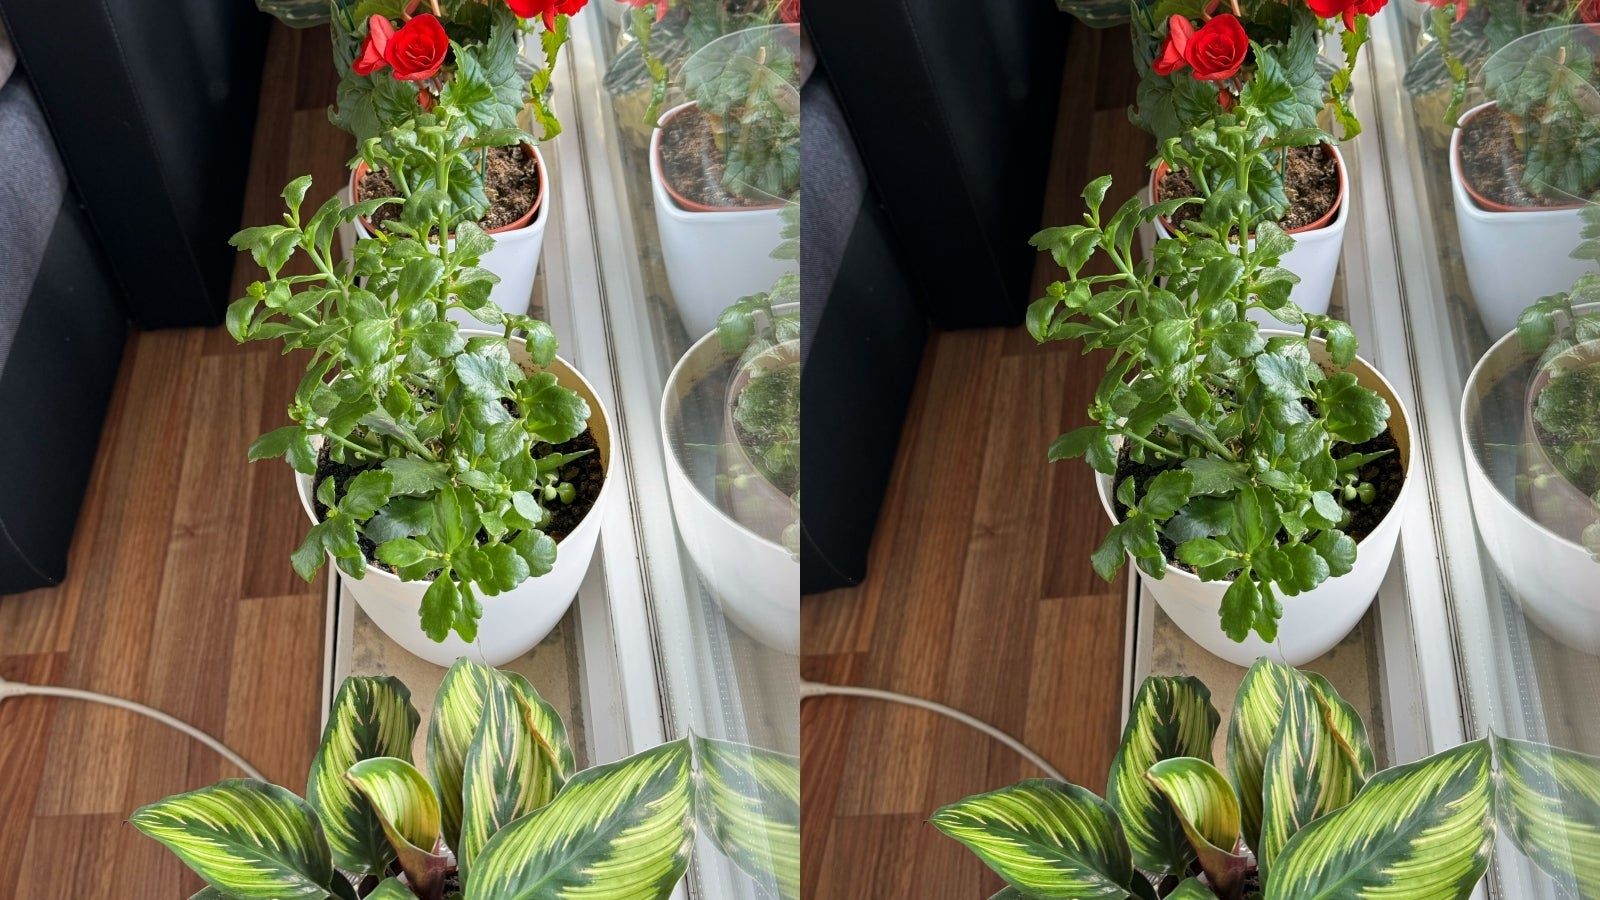
A light instance of overexposing. Left – authentic iPhone photograph. Proper – Brightness set to -30, Brilliance set to -20, Saturation set to -5.

A extra obvious instance of overexposing when taking a photograph underneath synthetic lighting. Default iPhone image (left) vs a extra real looking edit/rendition (proper).
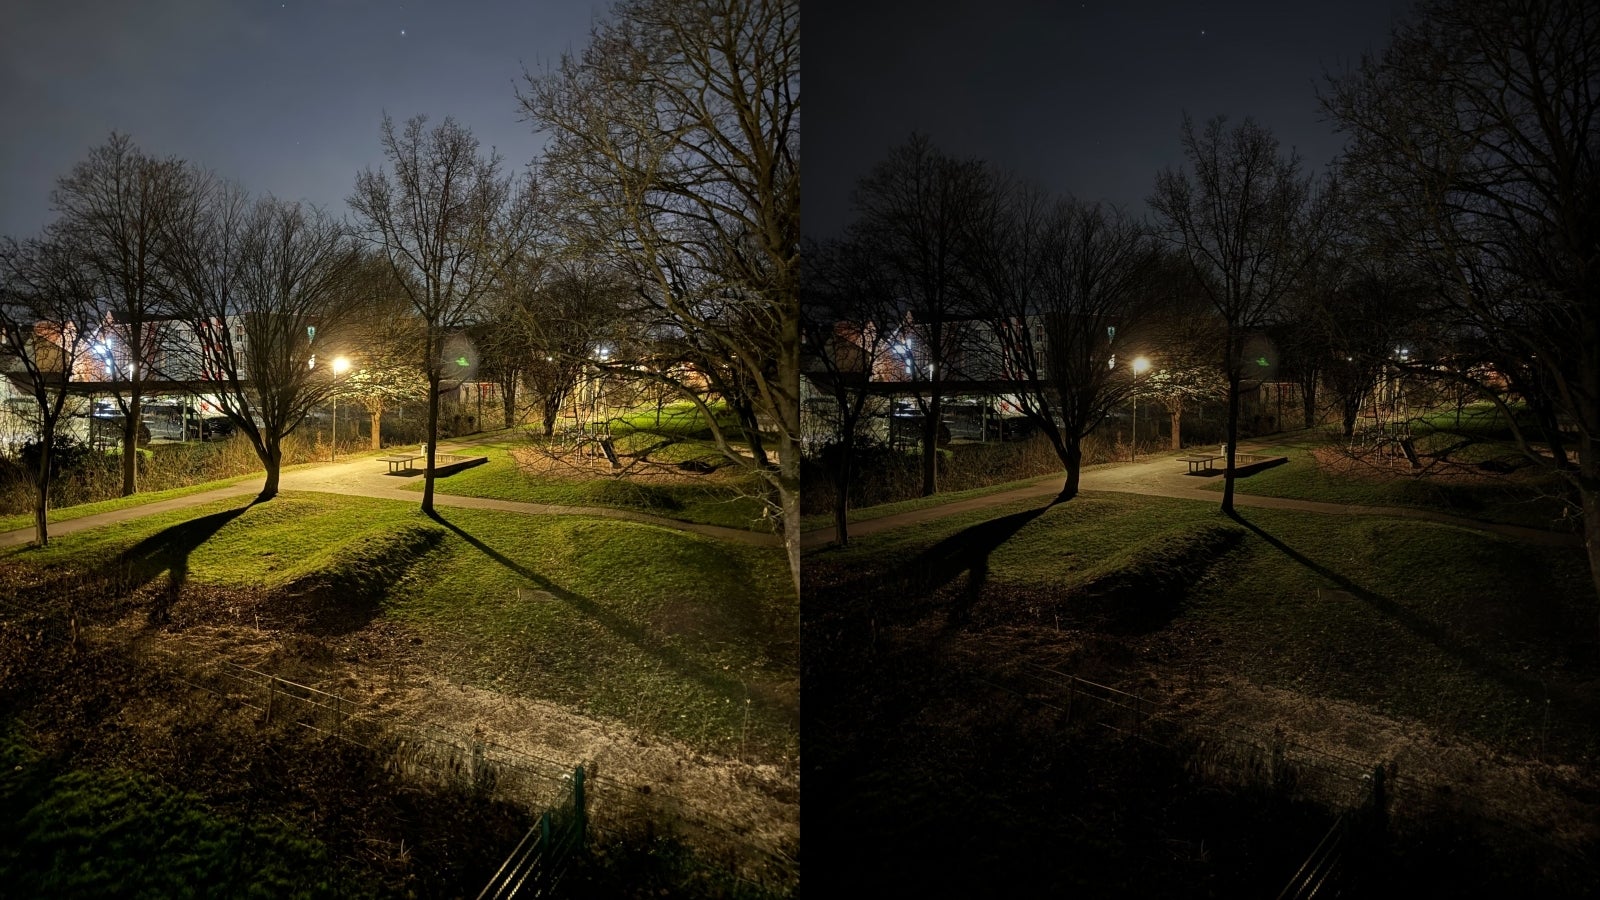
A traditional instance of iPhone brightening up Evening mode images an excessive amount of (left). On the appropriate, edited as follows – Publicity, Brilliance, and Brightness set to -50, Saturation set to -25, Vignette set to +15.
This one’s a extra sensible tip I’ve for you, however I really consider it may make your images and movies higher, and extra real looking, and there’s two methods to go about it – by altering your iPhone digicam settings, or by enhancing your images/movies after the very fact. Both means, I’m speaking about reducing the publicity/brightness of your images and movies.
Like many different telephone cameras, the iPhone digicam additionally loves overexposing, or just making images and movies means too shiny for no obvious motive, they usually typically find yourself wanting washed out.
- Your first possibility is to show down the publicity of your images and/or movies – this may be achieved individually. If you open your iPhone digicam, you’ll see a tiny histogram-looking button within the high left nook. This allows you to set your default publicity – I recommend going with a minimum of -0,3, though -0,7, and even -1,0 will be wanted when taking images/movies when it’s too shiny exterior/indoors.
- That being mentioned, the publicity setting will be inconsistent, which is ironic (because it’s a everlasting setting), and that’s as a result of your lightning circumstances all the time change. In that case, your second possibility is to easily edit your images/movies after the very fact, which could be the easiest way to go about it in any case. Merely hit the Edit button in your digicam app, and begin setting Publicity and/or Brightness down till the photograph/video appears to be like extra real looking.
You’d be shocked to see to what extent the iPhone digicam can brighten issues generally. I typically edit my images (and particularly my movies) by dragging the Brightness down by 50% – though round 30% is commonly extra correct to the scene.And don’t even get me began on Evening mode images, which just about all the time come out far, far brighter than they need to be.
Professional tip: You typically want to pull down the Brilliance and Saturation too – in order for you essentially the most correct photograph.
Take beautiful Portrait mode images with iPhone 15 with out the necessity to use “Portrait mode” – even at evening!

That is how an iPhone 15 Professional Max 5x night-time portrait comes out with out Evening mode, or the flash. Picture by Danny Winget on YouTube.
As of now, this one solely applies to iPhone 15 customers, who would possibly/may not know they not want to change to Portrait mode to take a Portrait mode photograph. With iPhone 15 collection, each photograph of a human/pet you’re taking is mechanically saved as a Portrait mode photograph too, and you should utilize the toggle that seems within the high left nook of the photograph to change between the portrait and commonplace model of the image.
However what some folks would possibly’ve missed is that the identical applies to images of just about the rest – not simply folks/pets. Merely faucet on the factor you’re taking a photograph of, and if the topic is throughout the acceptable distance, you get the identical automated Portrait mode shot with out going into “Portrait mode”.
You’re lacking out on some nice Portrait mode images at evening, since you aren’t utilizing your iPhone’s flash
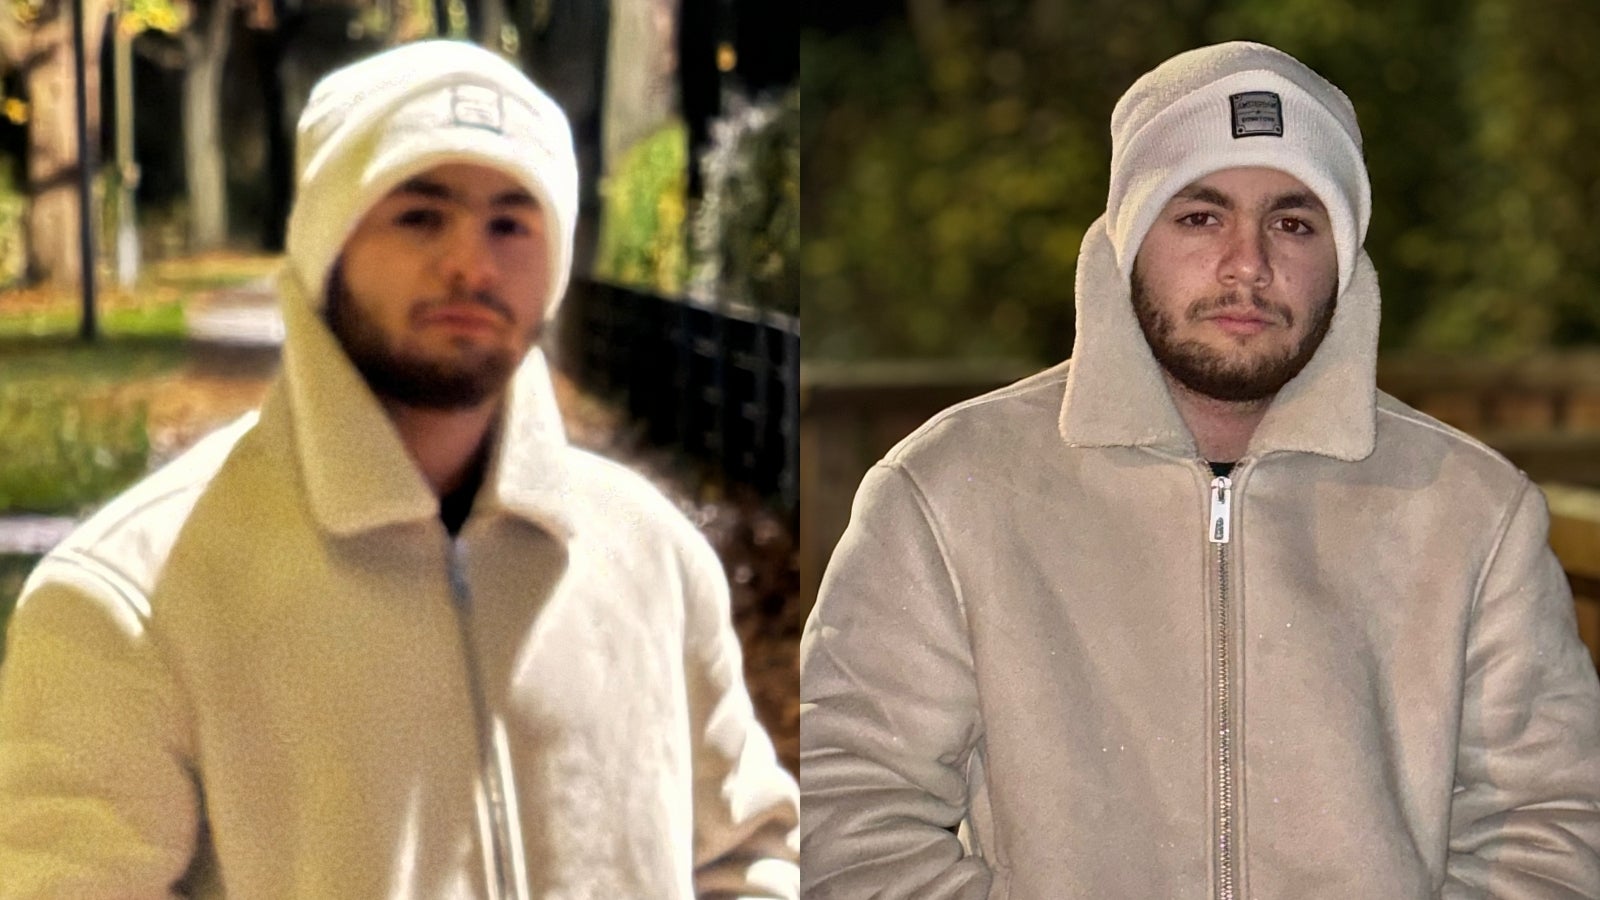
The iPhone 15 Professional Max couldn’t deal with the topic on this 5x portrait try (left) vs the great 2x portrait I took with the flash on.
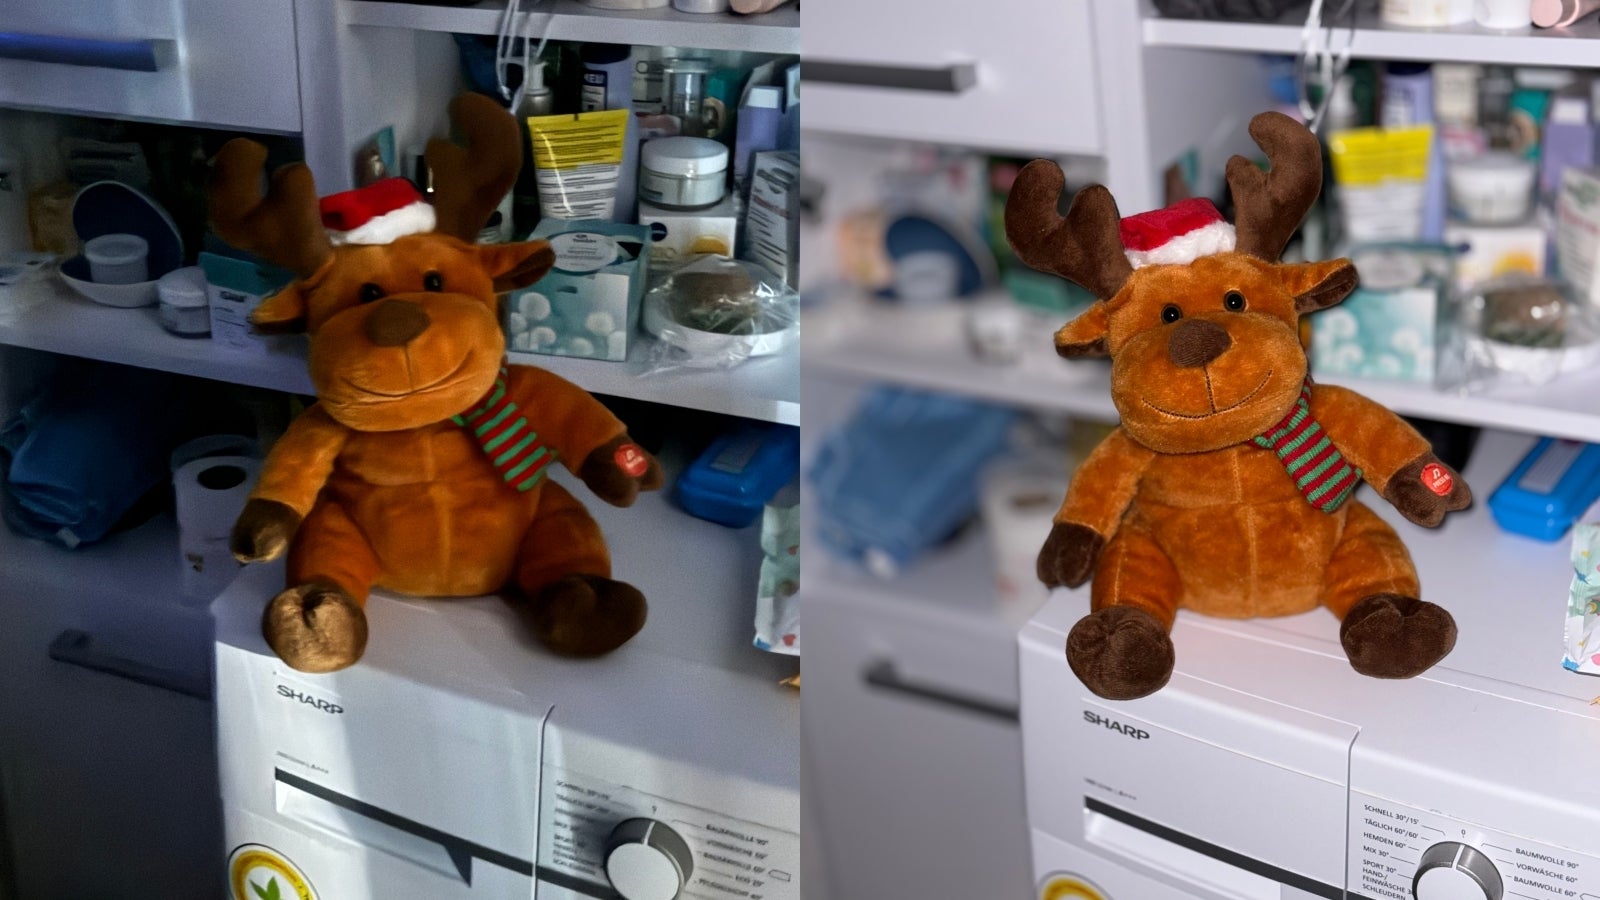
iPhone 15 Professional Max 2x Evening mode photograph (left) vs 2x flash photograph (proper). Turning on the flash enables you to use Portrait mode to blur out your messy rest room whereas getting a far Sharp-er image.
However to take it a step farther and provide you with an actual Portrait mode “professional tip”, I’ll let you know how one can take the most effective portraits you’ll be able to presumably take together with your iPhone – even when it’s darkish exterior.
Because it stands, Apple solely enables you to take Portrait mode + Evening mode images together with your 1x digicam, however utilizing the above-mentioned methodology, you’ll be able to merely take a typical image with any of your zoom cameras (2x, 3x, 5x) by turning OFF Evening mode, and turning in your flash! It’s also possible to go straight into Portrait mode so that you don’t must faucet in your topic.
Positive, the flash generally is a bit too harsh generally (like within the image of the stuffed deer) however that’s principally since you’re too near your topic – often taking pictures with the 1x digicam, or utilizing the 2x zoom with out sufficient room to step again (once more, like within the photograph of the stuffed deer).
However I’d argue the flash nonetheless has a spot in smartphone images if you know the way and when to make use of it. In reality, the iPhone’s highly effective flash (in tandem with the LiDAR sensor) can produce some good 2-3x zoom Portrait mode images with out providing you with the acquainted “flash look” you’d get if you happen to had been taking pictures up anyone’s nostril. To not point out, these zoom portraits would actually be unimaginable to take utilizing Evening mode, since Apple hasn’t enabled that characteristic.
The good flash portraits are potential, as a result of Apple has (apparently) optimized the depth of the flash (mild) relying on which digicam you’re utilizing and the space out of your topic (due to LiDAR), that means Evening mode isn’t all the time going to be your finest guess for evening portraits, which (once more) you’ll be able to solely take with the your major (1x) digicam.
Motion mode on iPhone isn’t just for movies that contain “motion”, working, and leaping round
And since this story is getting means too lengthy, I’ll maintain the final bits quick.
You’re in a shifting automotive/prepare and desire a easy video? You should use the iPhone’s Motion mode not solely when strolling/working however when recording movies from a shifting automobile.
The instance above exhibits a video taken with the iPhone’s 5x zoom digicam whereas the individual is taking a bumpy trip in a golf cart.
The one factor to bear in mind is that Motion mode wants sufficient mild to work, and if it’s too darkish, iPhone merely tells you it may’t interact Motion mode.
At all times get completely straight traces when drawing over an iPhone photograph/screenshot
And to complete it off, this one isn’t essentially an iPhone “digicam” trick however I do know it’ll be tremendous helpful to everybody!
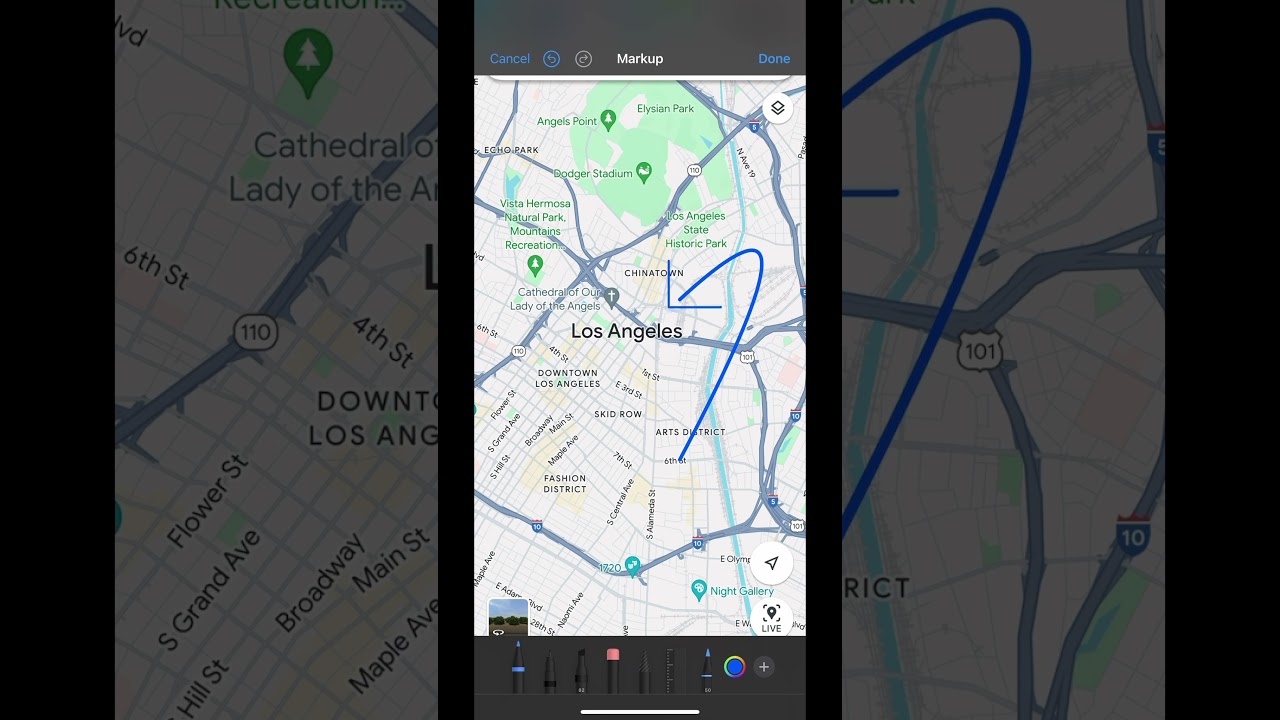
When enhancing an iPhone photograph to be able to draw an arrow/form that highlights one thing within the photograph/screenshot, drawing a straight line/form will be almost unimaginable. Except you realize this trick.
As proven within the display screen rec I took, when drawing a line/form over an image, merely maintain your finger down with out letting go, and the traces/shapes magically develop into… straight. The extra you realize!