

– Commercial –
Think about a smartwatch whose show acts as an interface serving you each as a keyboard and a mouse! What if I inform you that it’s simply potential.

Beforehand, in March 2023 problem, we revealed a challenge for a smartwatch with an ESP32 board that includes Wi-Fi evaluation and well being monitoring capabilities. Constructing upon this, allow us to now create a smartwatch that may perform as a wearable human interface machine (HID). This watch can function each a keyboard and a mouse, offering management over telephones, laptops, and many others. It acts as a transportable keyboard with mouse performance, worn on the wrist.
– Commercial –

This design utilises the board referred to as Indusboard coin together with GC9A01 driver and CST816S capacitive contact driver-based show, completely suited to a spherical show. The show is related to the Indusboard utilizing SPI and I2C pins onboard. Check with Fig. 1 for the creator’s prototype. The parts required for this machine are listed in Invoice of Supplies desk.
| Invoice of Supplies | ||
| Elements | Description | Amount |
| Indusboard | Growth board | 1 |
| USB Sort C | Adaptor | 1 |
| Spherical contact show | GC9A01 driver and CST816S capacitive contact driver |
1 |
Software program coding
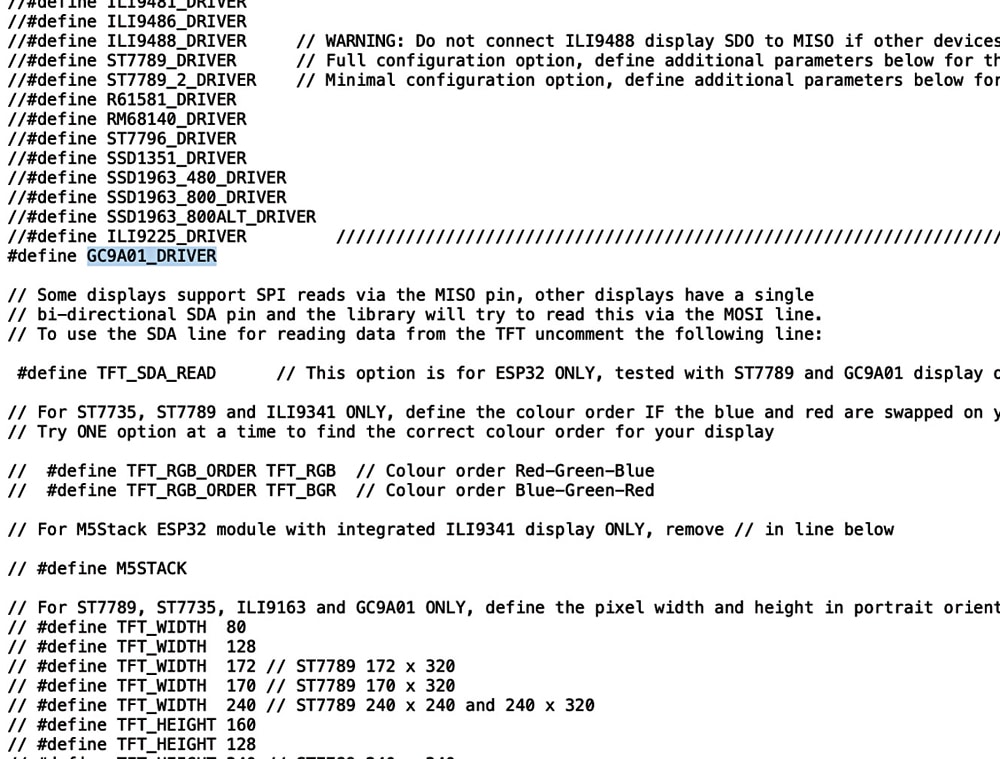
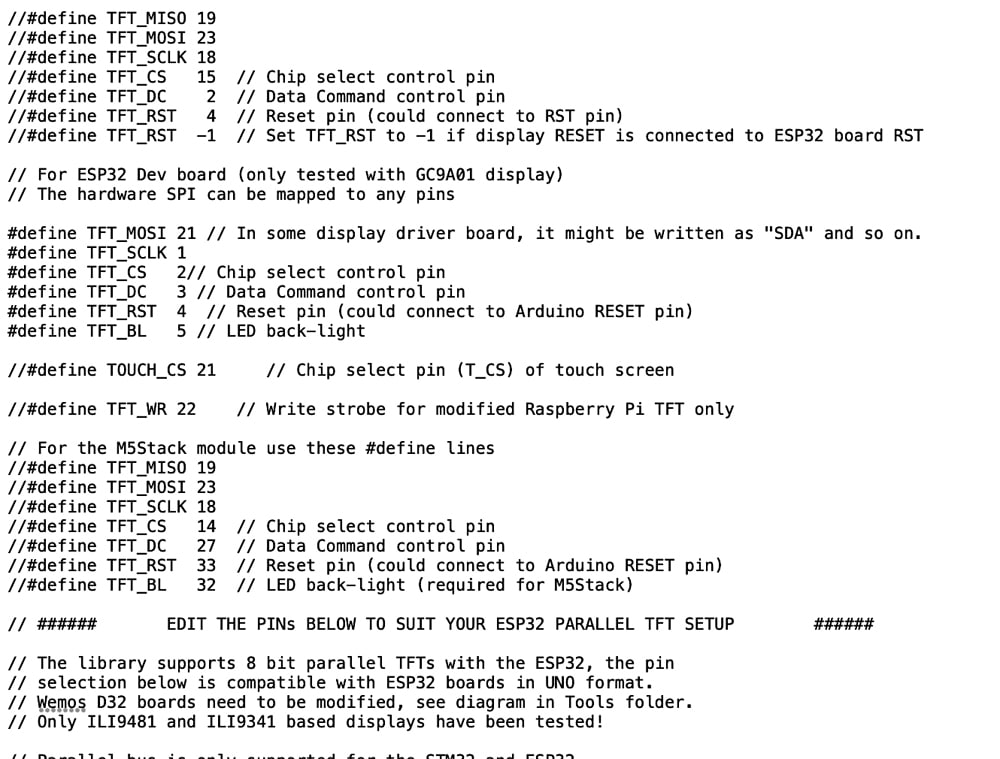
The code is created utilizing Arduino and the TFTeSPI library, with the CST816S contact driver library driving the show and touchscreen. The HID library comes pre-installed with the ESP32S2 Board SDK, so solely TFTeSPI and CST816 libraries should be put in. Seek for them within the Arduino library supervisor and set up. Configure the show driver and SPI pins within the TFTeSPI library folder discovered within the Arduino library folder. Open the consumer config file for the library and uncomment the GC9A01_Driver. Set the MISO, MOSI, CS, and DC pins within the configuration file. Check with Figs. 2 and three for settings.
Now, two codes should be written: one for the touchpad mouse and the opposite for the keyboard.
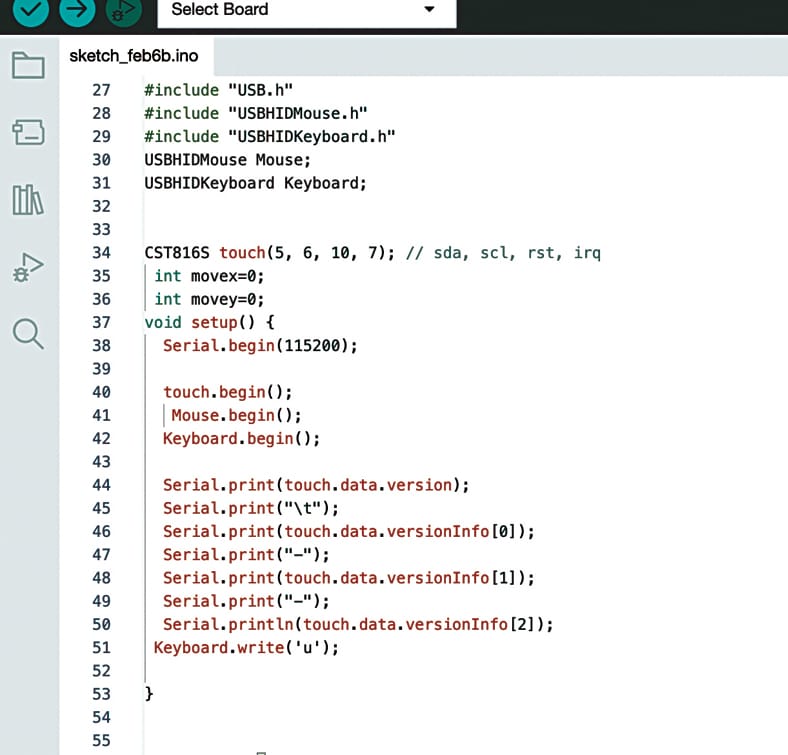
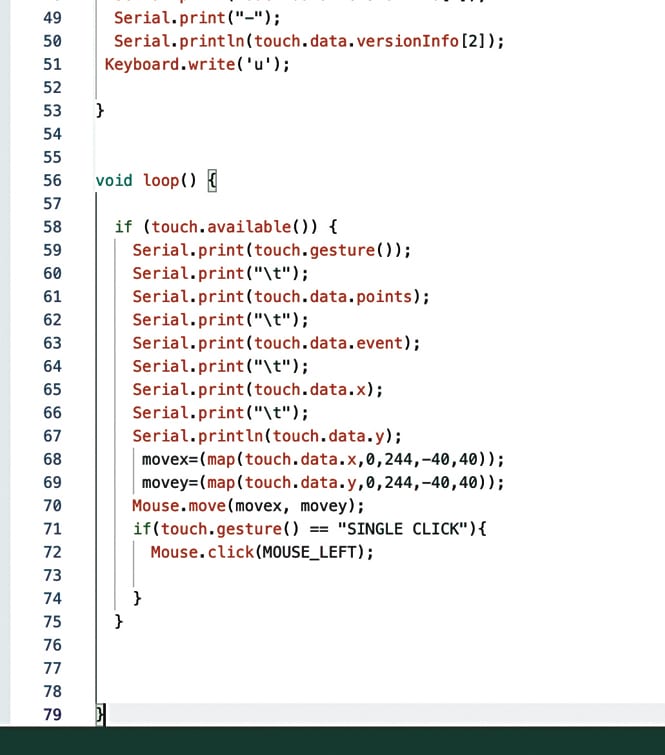
Code for touchpad mouse. For the mouse, embody the mouse HID library and outline the I2C pins for the show. Any pin on the Indusboard can be utilized because the I2C pin. Right here, the pins 5 and 6 are used as SDA and SCL for I2C pins. Within the code, map the contact factors with mouse actions and use gestures like left swipe, proper swipe, single faucet, and double faucet for mouse clicks. Check with Figs. 4 and 5 for code snippets.
Code for keyboard. Embrace the HID library for Indusboard and set the I2C pins of the contact show driver. Any pin on the Indusboard might be configured as an I2C pin. Right here, the pins 5 and 6 are used. Check with Fig. 6 for code settings.
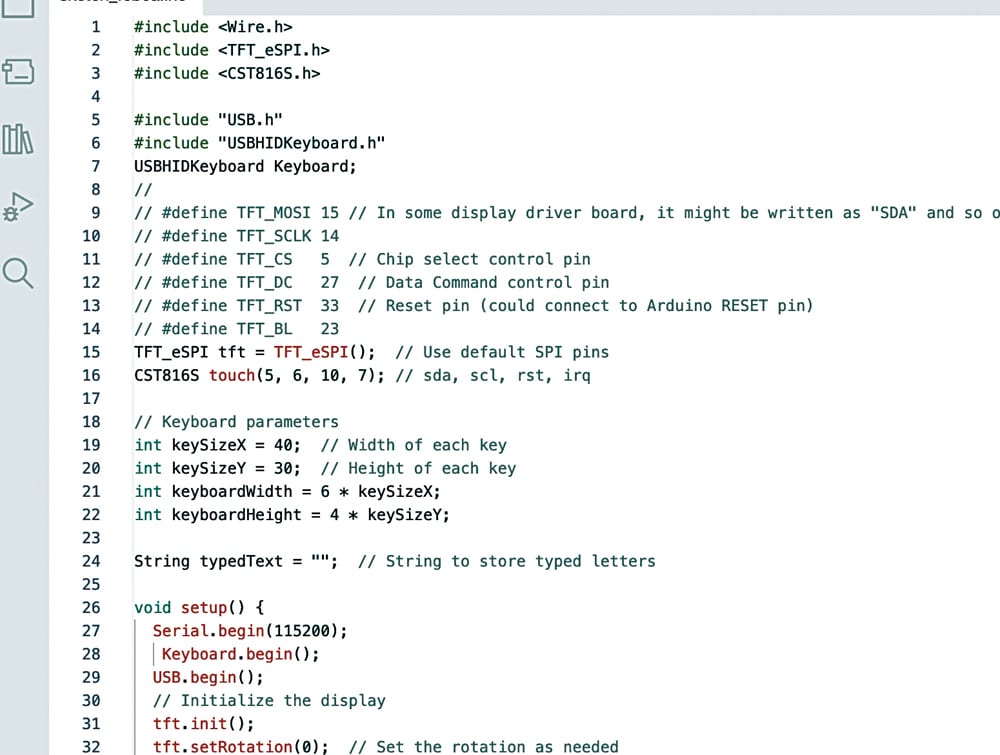
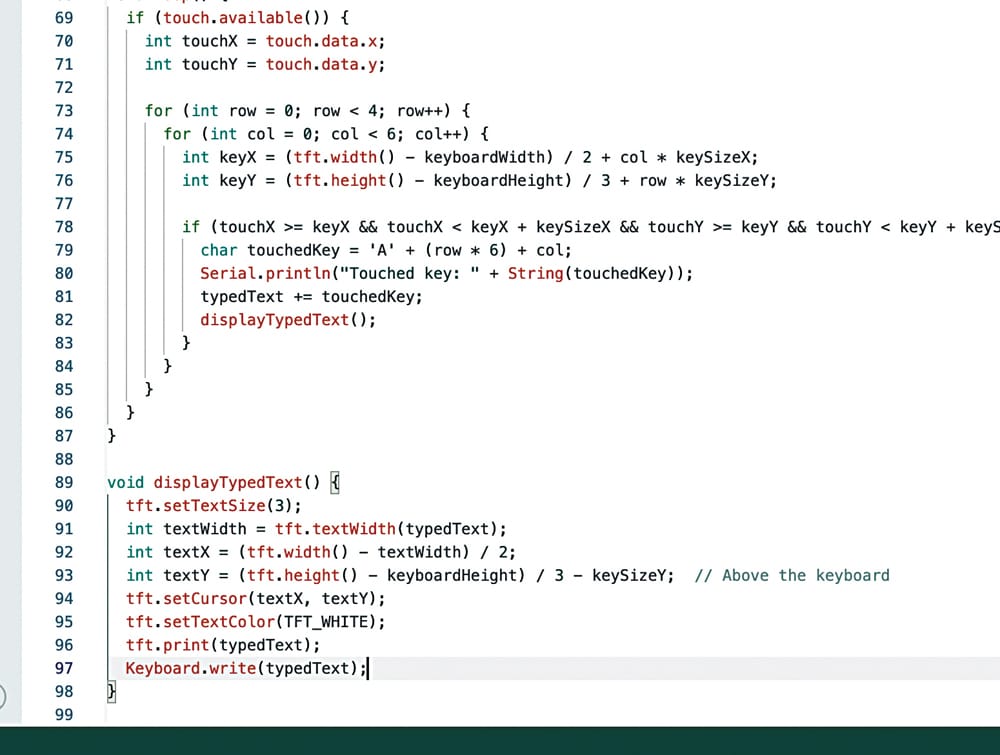
Create the keyboard structure, show it on the keyboard, map the touchpoints to the displayed keys, and detect contact on these keys. Then, ship that letter as HID enter to the laptop computer. Check with Fig. 7 for the code snippet for the keyboard. Fig. 8 exhibits the code snippet to detect the contact level and ship as HID enter.

After together with all of the libraries, add the code by choosing the ESP32S2 because the chip and the appropriate port.
Circuit diagram
Join the show and contact pins based on the circuit diagram proven in Fig. 9. Solder the pins behind the Indusboard. The Indusboard dimension matches completely behind the show like a watch. Check with Fig. 10 for soldering and placement of the Indusboard.

Testing

After correct meeting, energy the Indusboard. When the code for the keyboard is uploaded, it exhibits the keyboard structure, and touching the keys will kind the corresponding alphabets and letters. When the code for the mouse is uploaded, shifting a finger on the show will transfer the mouse pointer together with the contact actions. Check with Fig. 11 for the creator’s testing of the smartwatch contact keyboard.
