


With the appearance of synthetic intelligence, robots discover utility in varied sectors reminiscent of business, houses, bars, eating places, occasions, agriculture, and even house. In gentle of the broad scope of robotic functions, this good water serving robotic was developed. Whereas there are a number of water-serving robots in the marketplace, many are pricey advanced in design, and heavy in weight.
This economical and light-weight water-serving robotic addresses this concern with a easy design. It demonstrates excessive precision in its management.

The Good Water Serving Robotic’s prototype is proven in Fig. 1. The parts required for this machine are listed within the Invoice of Supplies desk.
| Invoice of Supplies | |
| Parts | Amount |
| Arduino Uno (MOD1) | 1 |
| Bluetooth HC-05 (MOD2) | 1 |
| L298 motor driver | 1 |
| 12V, 500-RPM geared DC motor | 2 |
| Battery module 18650, 3.7V 2000mAh | 3 |
| Battery holder | 1 |
| Breadboard | 1 |
| Jumper wires | 20 |
| {Hardware} components reminiscent of 100cm diameter 4 tyres, wood planks, robotic chassis and screws | |
Good Water Serving Robotic – Circuit and Working
The circuit diagram of the good water serving robotic is proven in Fig. 2. It’s constructed round Arduino Uno (MOD1), Bluetooth HC-05 (MOD 2), an L298 motor driver, and some different parts.
Additionally Test: Fascinating Arduino Initiatives

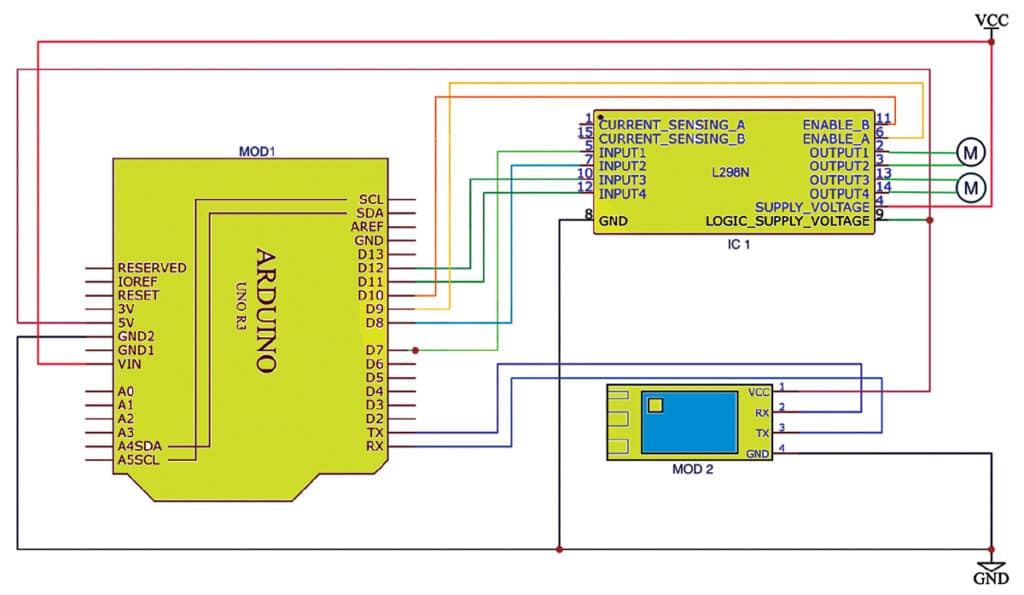
Join the VCC as per the circuit diagram to the optimistic terminal of the 12V battery and GND to the destructive terminal. For this setup, I used a battery holder and three 3.7V batteries. This totals 11 to 12V enter for the motors (3.7Vx3=11.1V). The Arduino makes use of the Vcc pin to transform this to 5V utilizing its built-in voltage regulator. Alternatively, a single 12V battery can be utilized.
The pins of the HC-05 Bluetooth module, reminiscent of Vcc, RX, TX, and GND, are linked to the corresponding Arduino Uno pins of Vcc, TX, RX, and GND, respectively.
Moreover, Arduino Uno pins D9, D10, D7, D8, D11, and D12 are linked to allow pins A, B, IN1, IN2, IN3, and IN4 of the L298 motor driver, respectively. The five hundred-RPM DC motor is connected to output1 and output2 pins 2 and three, in addition to output3 and output4 pins 13 and 14 of the L298 motor driver.

Arduino Code for Good Water Serving Robotic
Based mostly on the circuit proven in Fig. 2, the software program was developed on the Arduino platform. Arduino Uno has digital pins D2 by way of D13 and analogue pins A0 by way of A7. Arduino Uno sends instructions to the L298 motor driver, which in flip controls the motors to maneuver ahead, backward, left, or proper.
Arduino Uno receives instructions from an Android cellular app by way of the HC-05 Bluetooth sensor. The Android app may be downloaded from the Google Play Retailer.
When the consumer sends instructions like ‘f’ or ‘F’ from the cellular app to Arduino Uno, the automobile strikes ahead. Sending ‘B’ or ‘b’ instructions the automobile to maneuver backward. Instructions ‘L’ or ‘l’ provoke a left flip, ‘R’ or ‘r’ a proper flip, and ‘S’ or ‘s’ makes it cease.
This enables for handy management of the water-serving robotic by way of a cellular machine. The robotic may be deployed in faculties, school campuses, or occasions to serve water to employees throughout examinations or capabilities, lowering human effort, time, and value.
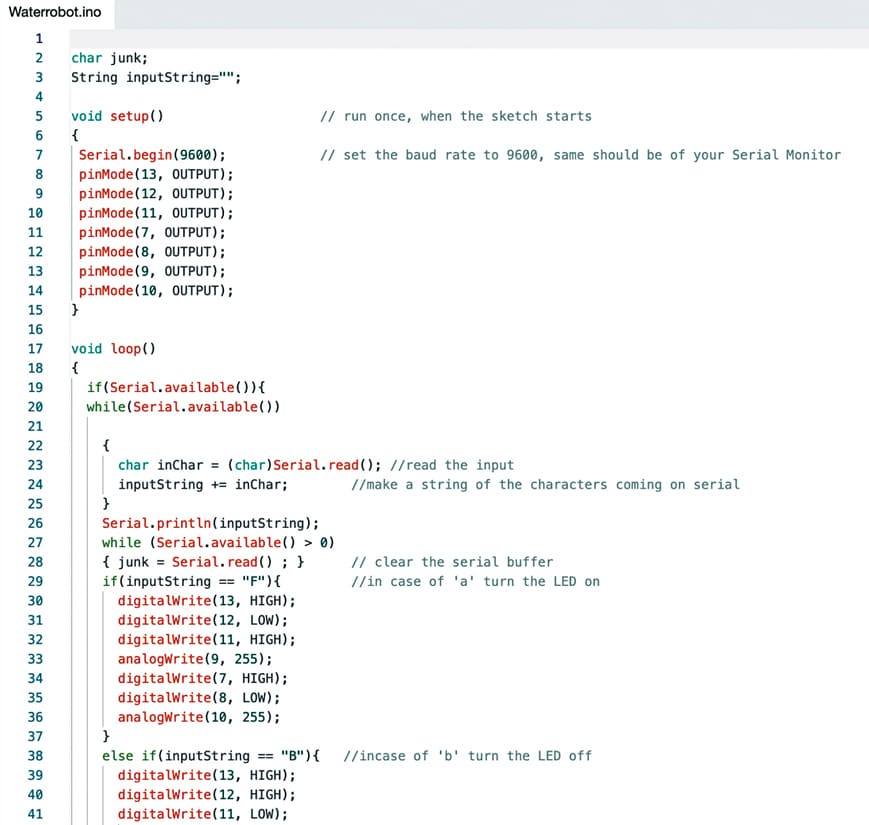
All capabilities are written on the Arduino platform and saved within the sketch as Waterrobot.ino. Fig. 3 exhibits a snippet of the supply code.
Earlier than meeting, add the supply code to Arduino by choosing the right board and port.
Development and Testing
To construct this robotic, Bluetooth expertise was utilized together with digital parts, together with Arduino Uno, Bluetooth module (HC-05), L298 driver, 12V, 500 RPM geared DC motor, 100cm diameter wheel with a 6mm shaft, breadboard, jumper wires, USB cable, wood plank, battery holder, and battery module 18650 3.7V 2000mAh. The programming of the machine is finished on the Arduino software program.
The L298N-based motor driver module 2A is a high-power motor driver excellent for driving DC-geared motors. It could management as much as 4 DC motors, or 2 DC motors with directional and velocity management.
Make connections as per the circuit diagram. Present voltage from the battery holder 18650 Li-ion cell. Test the standing of the HC-05 Bluetooth sensor; if the LED is glowing, it’s operational.
As soon as the HC-05 is on, open the serial Bluetooth terminal app in your cellular, change in your Bluetooth, test the machine record to attach, and join with HC-05 from the record. You could set a password like ‘0000’ or ‘1234’ if prompted. As soon as the cellular is linked to HC-05, ship indicators like characters ‘f’ for ahead, ‘b’ for backward, ‘r’ for proper, ‘l’ for left, and ‘s’ to cease to regulate the automobile.
Mechanical Meeting
Lower a wood plank to make the serving robotic chassis, then connect the wheels to the motors. On high of the chassis, affix a container for holding water or meals to be served to individuals. Alternatively, a readymade robotic physique with a container may be bought from the market.
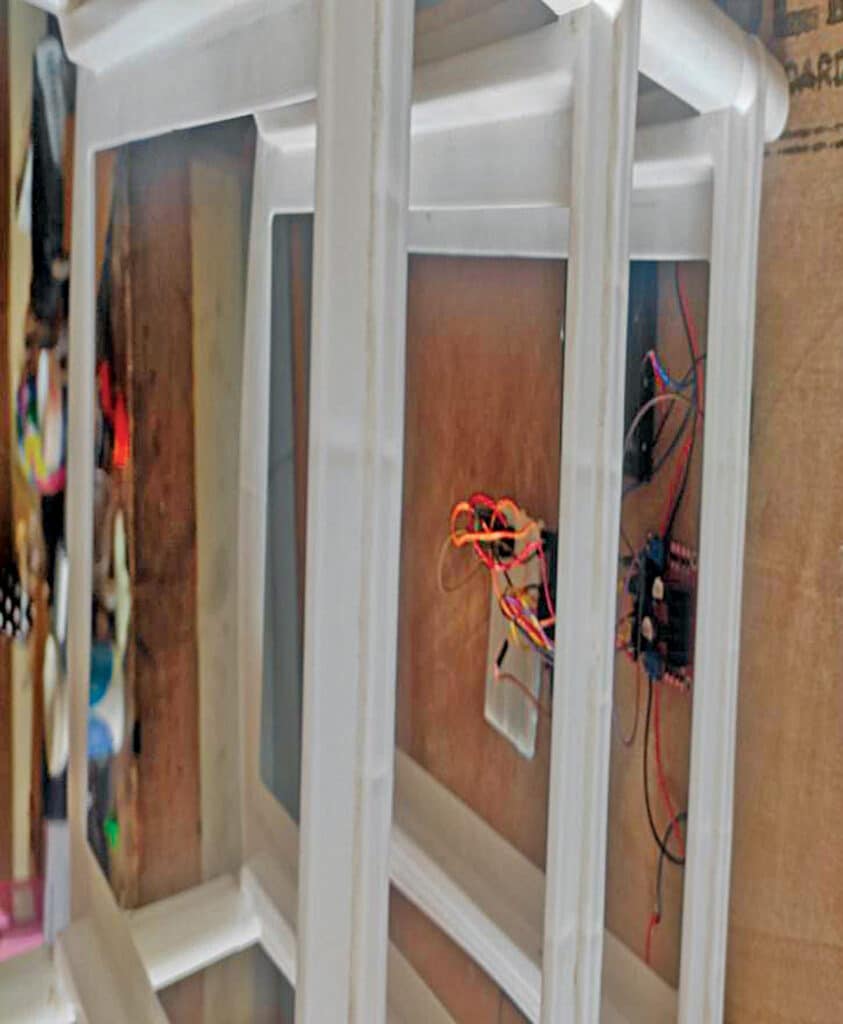
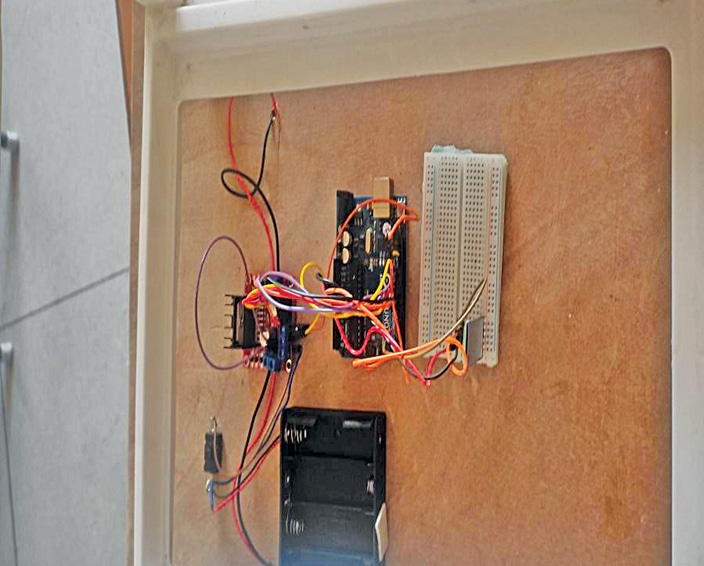
Fig. 4 exhibits the robotic chassis utilized by the writer, whereas Fig. 5 illustrates how the assembled circuit on the breadboard is mounted onto the robotic circuit.
Navpreet Singh Tung is accountable for the Synthetic Intelligence and Robotics Lab at Sandeepani Gurukul in Pathankot, Punjab, India