

At present, dwelling automation utilizing Web of issues (IoT) is likely one of the main domains which is attracting consideration from giant tech firms.
All of us wish to personal a sensible dwelling, however typically language turns into a barrier in organising IOT dwelling automation system. Many of the present dwelling automation techniques assist only some languages, typically English.
Wouldn’t it’s good if we are able to management our dwelling with a number of languages like Hindi, Bengali, Marathi and so forth?
Sure, it’s doable now! On this DIY undertaking, we’re going to make an IOT dwelling automation system that may assist you to management your private home with voice instructions given in your most well-liked language.
This dwelling automation system makes use of google assistant to manage the sensible gadgets at dwelling. So, it additionally helps all of the languages supported by the google assistant. We may even make an app to manage the system.

Let’s begin the undertaking –
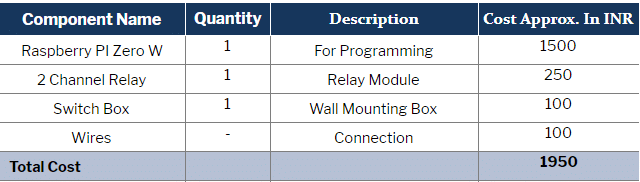
Invoice of Materials
Setting Raspberry Pi
The very first thing we have to do is to arrange an Apache server in Raspberry Pi. To do it, open the terminal window and run the next command.

sudo apt-get set up apache2 -y
After profitable set up of the server, we are able to examine it by typing the I.P tackle of your Raspberry Pi in any net browser. If the server is working high-quality, we are going to get the Apache web page within the net browser. Now, we are going to use our Apache server to course of PHP Information, for this it’s essential to have the most recent model of PHP module for Apache. To get this module run this command –
sudo apt-get set up php libapache2-mod-php -y
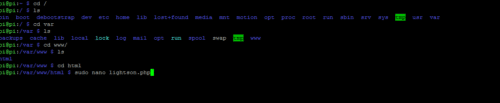
Subsequent, we are going to create a PHP file to manage the GPIO of Raspberry Pi. To take action, open terminal in Raspberry Pi and go to its html listing by this command as you may see in Fig 1.
Subsequent create a PHP file by utilizing “sudo nano lightsoff.php” command
and write the next piece of code in it,
<?php
System (“gpio -g mode 27 out”);
System (“gpio -g write 27 0”);
?>
Then press Ctrl+X to save lots of and exit from the editor.
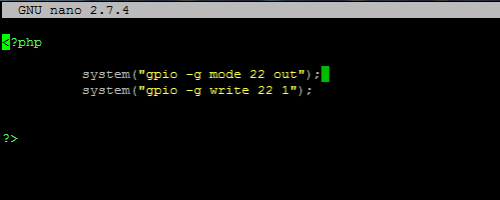
After this create a lightson.php file for turning the lights on and paste the next code in it.
<?php
System (“gpio -g mode 27 out”);
System (“gpio -g write 27 1”);
?>
Repeat the identical course of for controlling different GPIO of Raspberry Pi.
You may obtain the entire code for turning lights on and off from the hyperlink under.
Setting Google Assistant
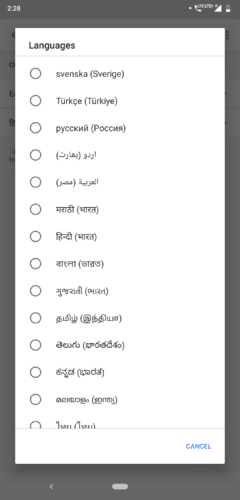
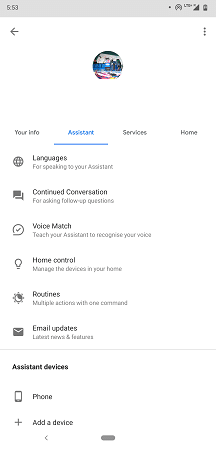
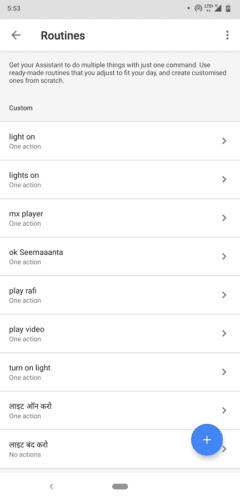
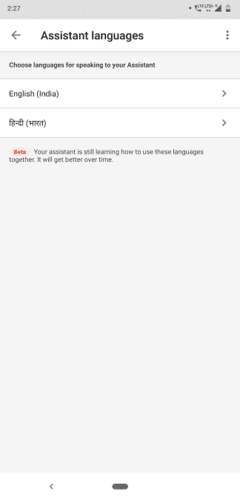
Now, we’re going to put together the google assistant for our voice command. First open the language settings of google assistant and choose the language of your alternative. Then open the google assistant settings and go to “Routines” possibility. You’re going to get a plus floating button within the menu of Routines, click on on that after which set the voice command that you just wish to create. For instance, if you wish to management lights, you may set the voice instructions in your most well-liked language to activate the lights. After this, set the motion for that voice command within the given format (Refer Fig. 3,4,5,6,7)
“search Rpi IP tackle/ PHP file title”.
Search 192.168……../ lightsoff.php.
Connection
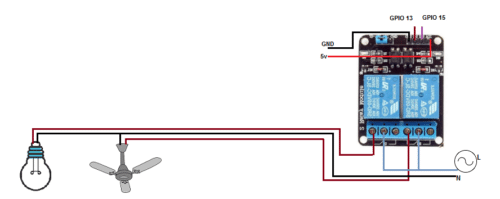
Now join the elements as illustrated under.
Raspberry pi Relay Board
GPIO 13 Relay IN 1
GPIO 15 Relay IN 2
5V Relay 5V
GND GND
App Making
We will additionally create an app to manage the lights. Let’s make the app.
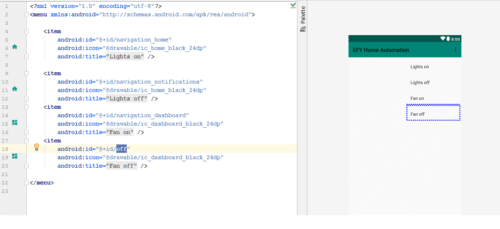
Open Android studio and create a brand new undertaking with backside navigation bar and do coding as illustrated under (Refer Fig. 10 ,11,12,13,14).
To start with, set the permission in app to entry the web as a result of we’re going to use Wi-Fi to manage GPIO of RPi.

Then go to Mainactivity.java and create a WebView and String variables as within the image under.
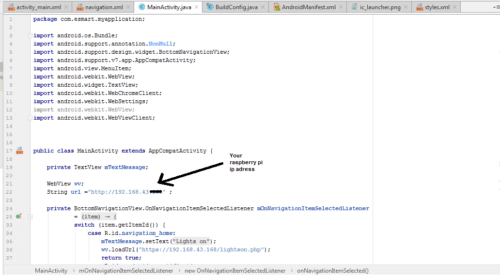
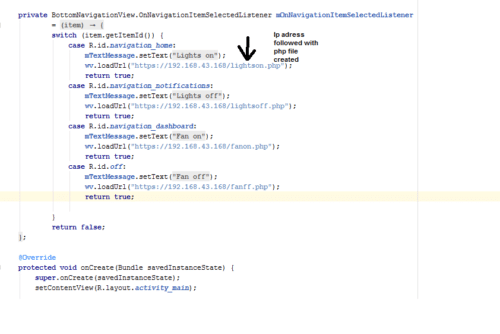
Fig 14. Creating Navigation bar

Testing :
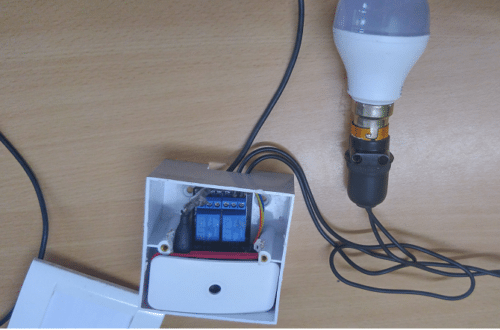
Energy the Raspberry Pi with 5V DC. Then join Raspberry Pi and your cellphone to your Wi-Fi community or you too can use cellphone HOTSPOT. Then say “hey google” adopted by the voice command that we have now set in our most well-liked language. For instance, say “hey google mild on kar do”
And it’ll activate the lights. You can even management lights with the app we have now simply created. Open the app and press the icons in navigation to show the lights on/off
👇Observe extra 👇
👉 bdphone.com
👉 ultraactivation.com
👉 trainingreferral.com
👉 shaplafood.com
👉 bangladeshi.assist
👉 www.forexdhaka.com
👉 uncommunication.com
👉 ultra-sim.com
👉 forexdhaka.com
👉 ultrafxfund.com
👉 ultractivation.com
👉 bdphoneonline.com