


As a Node.js developer, you’re most likely keen to place your JavaScript expertise to work past the browser or server, diving into the world of {hardware} management with Raspberry Pi GPIOs. If that’s the case, you’re in the suitable place!
This text is the third a part of our collection, following A information to visualise your Raspberry Pi information on Arduino Cloud | Half I and the Python-focused Management your Raspberry Pi GPIO in Arduino Cloud utilizing Python | Half II, which launched GPIO administration. Now, it’s time to discover how Node.js might be your gateway to controlling Raspberry Pi GPIOs, a foundational process in IoT growth. Whether or not you’re toggling LEDs, studying sensors, or controlling relays, Node.js gives the instruments and suppleness to make it occur seamlessly.
However IoT isn’t nearly managing {hardware} regionally. True IoT initiatives require distant dashboards that allow you to visualize real-time and historic information, and management gadgets from wherever. With Arduino Cloud, you are able to do all of this with ease.
Let’s dive in and see how one can take your IoT expertise to the following stage with Node.js and the Arduino Cloud!
Raspberry Pi fundamental GPIO setup
On this article, we current an easy but complete instance to reveal the ability of Arduino Cloud. You’ll learn to use an Arduino Cloud dashboard to remotely management and monitor your Raspberry Pi’s digital GPIOs. Particularly, we’ll cowl easy methods to:
- Flip an LED linked to your Raspberry Pi on and off.
- Detect when a push button linked to your Raspberry Pi is pressed.
- Visualize the real-time and historic values of an integer variable.
To get began, let’s join an LED and a push button to your Raspberry Pi as illustrated within the diagram beneath.
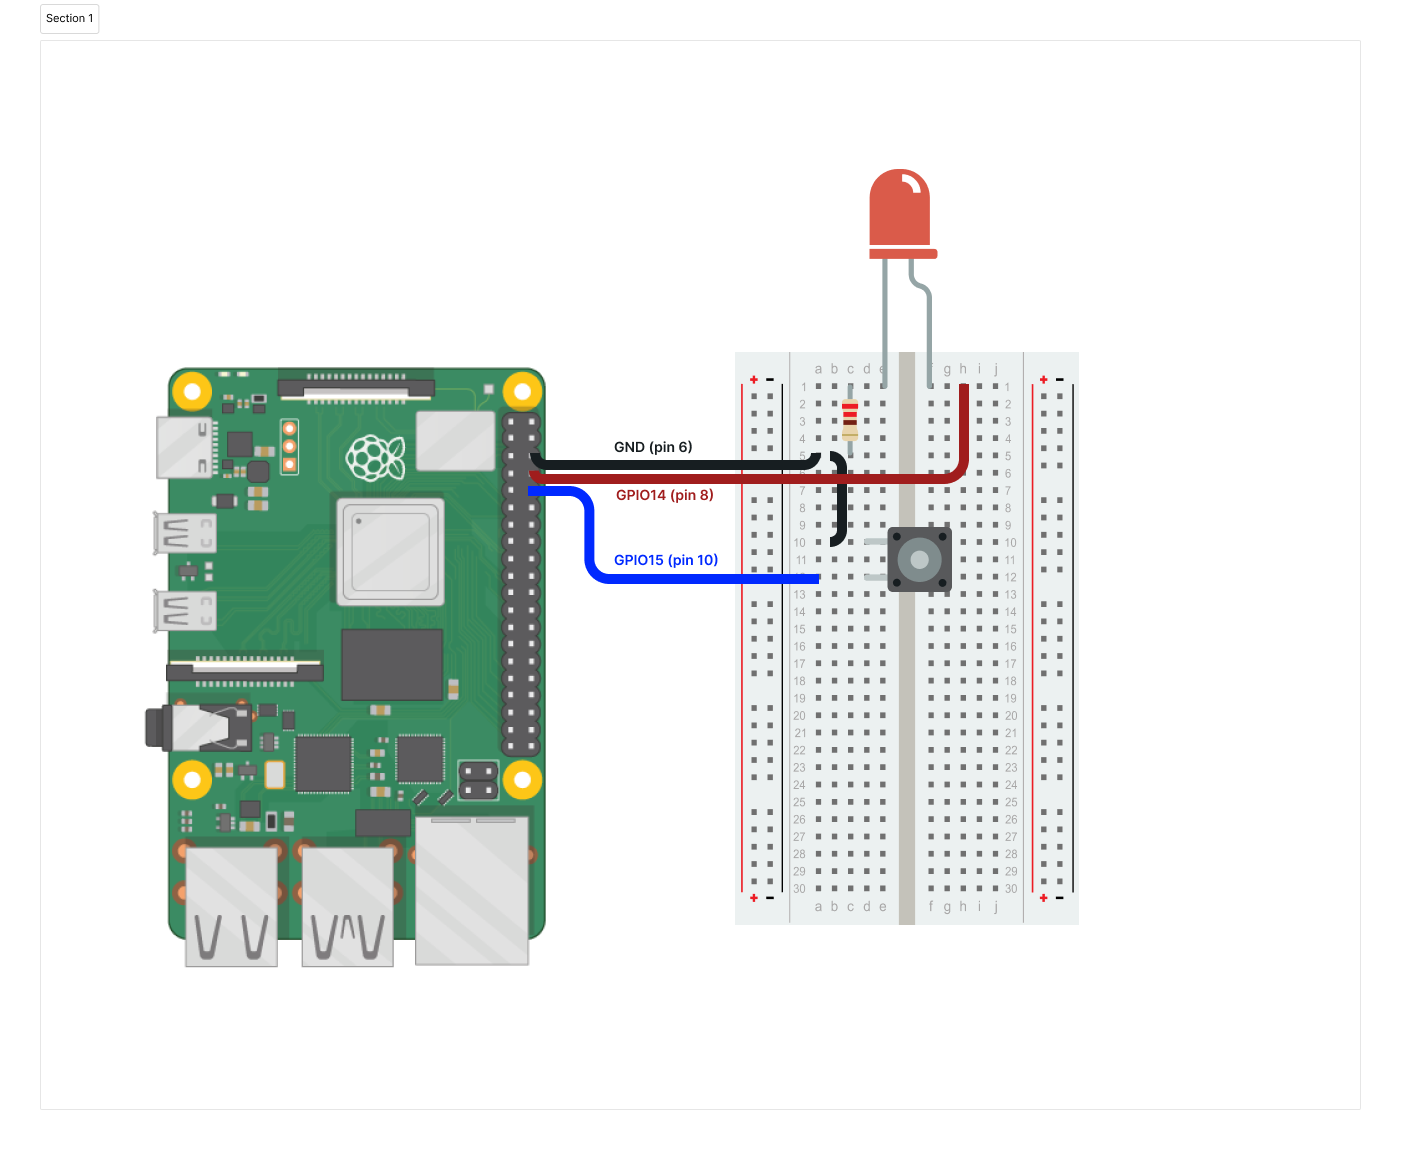
It’s a quite simple setup. Now that we now have the whole lot prepared, let’s get began!
Create the System and Factor in Arduino Cloud
To ship your Raspberry Pi information to Arduino Cloud, it’s important to comply with these easy steps:
1. Arrange an Arduino Cloud account for those who didn’t have one earlier than.
2. Create your machine as a Guide machine.
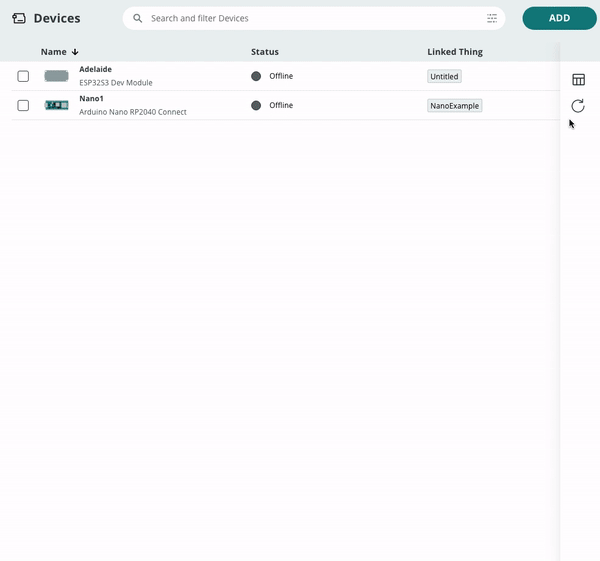
Notice: Jot down your System ID and Secret, as we are going to want them later.
3. Create your Factor and add your variables.

Within the instance proven on this weblog put up, we use the next three variables:
- test_value: We’ll use this integer variable to point out an integer worth generated periodically in our Raspberry Pi software in our Arduino Cloud dashboard.
- button: We’ll use this boolean variable to ship the data to the Cloud when the push button is pressed.
- led: We’ll use this boolean variable to modify on and off the LED from the Arduino Cloud dashboard.
Create an Arduino Cloud dashboard for information visualization:
- Create a change widget (title: LED) and a LED widget (title: LED) and linke them to the led variable.
- Create a chart widget (title: Worth evolution) and a Worth widget (title: Worth) and hyperlink them to the test_value variable.
- Create a Push button (title: Push Button) and a Standing widget (title: Button) and hyperlink them to the button variable.

With the dashboard, it is possible for you to to:
- Change ON and OFF the LED utilizing the change widget
- Visualize the standing of the LED with the LED widget
- Visualize the true time worth of the variable test_value with the Worth widget
- Visualize the evolution over time of the variable test_value with the chart widget
- Visualize on the Push Button and Button widgets when the push button has been pressed on the board
Notice: You will discover extra detailed details about the total course of in our documentation information.
Program your IoT machine utilizing Node.js
Now it’s time to develop your Node.j software.
const gpiod = require('node-libgpiod');
const { ArduinoIoTCloud } = require('arduino-iot-js');
const { DEVICE_ID, SECRET_KEY } = require('./credentials');


// Modify these strains in response to your board setup
const GPIOCHIP = 'gpiochip4';
const LED = 14; // GPIO14, Pin 8
const BUTTON = 15; // GPIO15, Pin 10


// Be certain that these variables are world. In any other case, they won't
// work correctly contained in the timers
chip = new gpiod.Chip(GPIOCHIP);
ledLine = chip.getLine(LED);
buttonLine = chip.getLine(BUTTON);


ledLine.requestOutputMode("gpio-basic");
// To configure the pull-up bias, use 32 as a substitute of gpiod.LineFlags.GPIOD_LINE_REQUEST_FLAG_BIAS_PULL_UP whether it is undefined
buttonLine.requestInputModeFlags("gpio-basic", gpiod.LineFlags.GPIOD_LINE_REQUEST_FLAG_BIAS_PULL_UP);


let shopper;


// This operate is executed each 1.0 seconds, polls the worth
// of the button and sends the info to Arduino Cloud
operate readButton(shopper) {
  let button = buttonLine.getValue() ? true : false;
  if (shopper)
     shopper.sendProperty("button", button);
  console.log("pollButton:", button);
}


// This operate is executed each 10.0 seconds, will get a random
// quantity between 0 and 100 and sends the info to Arduino Cloud
operate readValue(shopper) {
  let worth = Math.flooring(Math.random() * 101);
  if (shopper)
     shopper.sendProperty("test_value", worth);
  console.log("pollValue", worth);
}


// This operate is executed every time the "led" variable adjustments
operate onLedChanged(led) {
  ledLine.setValue(led ? 1 : 0);
  console.log("LED change! Standing is: ", led);
}


// Create Arduino Cloud connection
(async () => {
  strive {
     shopper = await ArduinoIoTCloud.join({
        deviceId: DEVICE_ID,
        secretKey: SECRET_KEY,
        onDisconnect: (message) => console.error(message),
     });
     shopper.onPropertyValue("led", (led) => onLedChanged(led));
  }
  catch(e) {
     console.error("ArduinoIoTCloud join ERROR", e);
  }
})();


// Ballot Worth each 10 seconds
const pollValue = setInterval(() => {
  readValue(shopper);
}, 10000);


// Ballot Button each 1 seconds
const pollButton = setInterval(() => {
  readButton(shopper);
}, 1000);
Create a file referred to as credentials.js together with your System ID and secret.
module.exports = {
   DEVICE_ID: '09d3a634-e1ad-4927-9da0-dde663f8e5c6',
   SECRET_KEY: 'IXD3U1S37QPJOJXLZMP5'
 };
This code is suitable with all Raspberry Pi fashions and must also work on any Linux-based machine. Simply ensure to specify the right gpiochip and configure the suitable GPIO strains within the code snippet beneath:
const GPIOCHIP = 'gpiochip4';
const LED = 14; // GPIO14, Pin 8
const BUTTON = 15; // GPIO15, Pin 10
For extra details about the mission, try the main points on Venture Hub. You will discover the whole code and extra sources within the Github repository. Plus, don’t miss the great JavaScript + Arduino Cloud information within the following article.
Begin with Arduino Cloud without spending a dime
Getting your Raspberry Pi linked to Arduino Cloud with Node.js is extremely easy. Merely create your free account, and also you’re able to get began. Arduino Cloud is free to make use of and comes with non-compulsory premium options for even larger flexibility and energy.
Should you’re able to simplify information visualization and distant management to your Raspberry Pi purposes utilizing Node.js, Python, or Node-RED, Arduino Cloud is the right platform to discover and elevate your initiatives.
Get began with Arduino Cloud!
👇Comply with extra 👇
👉 bdphone.com
👉 ultractivation.com
👉 trainingreferral.com
👉 shaplafood.com
👉 bangladeshi.assist
👉 www.forexdhaka.com
👉 uncommunication.com
👉 ultra-sim.com
👉 forexdhaka.com
👉 ultrafxfund.com
👉 bdphoneonline.com
👉 dailyadvice.us
